Trekking to the Himalayas offers great joy with all the beauty of mountains, beautiful forests, and valleys. But at some point along the trek, you can encounter a stream or even a river blocking your route. Most Himalayan treks have river crossings, and it is known that rivers can be deadly if approached without respect.
Crossing a river is simple unless you know how to cross it safely. Otherwise, trouble will follow you in the form of fast currents, cold water, deep water, and slippery rocks are there in the river stopping you from crossing it. This guide will give you valuable instructions concerning the safe crossing of streams and rivers while trekking. Now, let’s learn how to do it the right way!
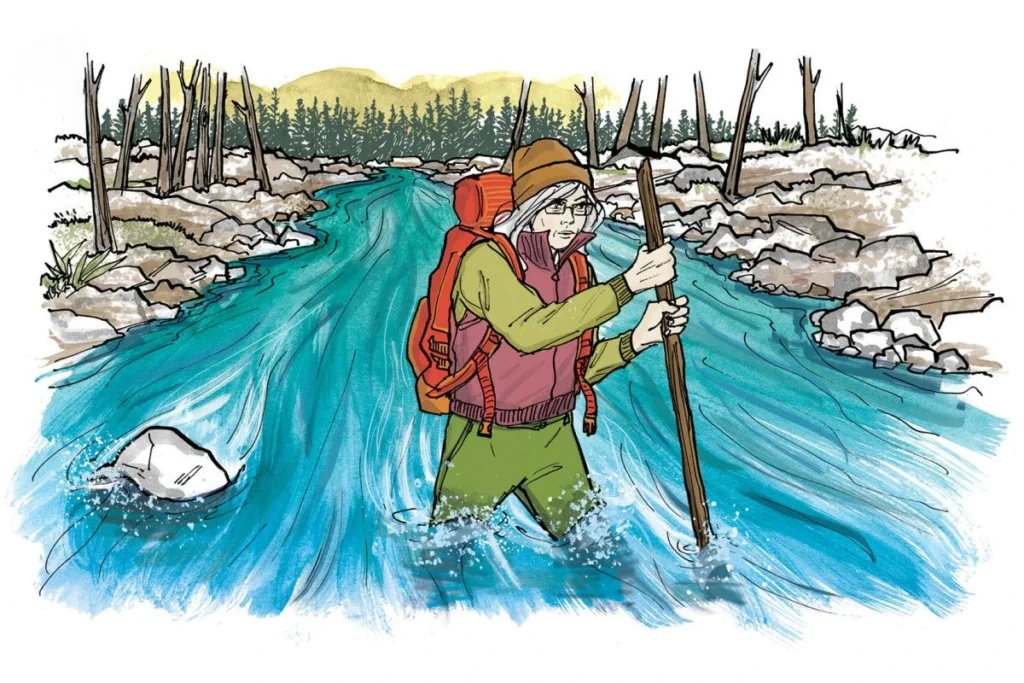
Table of Contents
Why Is It Dangerous to Cross a River?
There’s always an element of thrill while participating in the activity of crossing rivers, but it is quite dangerous. Here are some of the reasons why:
- Fast Water: If the water is fast, it will sweep you away easily.
- Deep Water: If the water is too deep, it will be hard to balance.
- Slippery Rocks: Rocks near the river are typically slippery and uneven. You can slip and fall.
- Cold Water: Cold water can numb your body in seconds, which is dangerous.
- Hidden Obstacles: There may be sharp rocks, deep holes, or submerged tree branches within the river that cannot be seen.
An important aspect of knowing these dangers is to make you cautious and alert in your crossing.
Before You Cross: Plan and Prepare
Planning always goes a long way to keep you safe while crossing. Some of the essentials include:
1. Weather Forecast:
Rain can make a river swell instantly and move fast. Always check for the weather report. If there has been heavy rainfall or rain in the last few hours, it is better to delay or take an alternative route. You can use platforms like AccuWeather, Weather Bug, All Trails, and CalTopo. You can invest in high-end GPS as well, which gives live updates when there are changes in atmospheric pressure, moisture, and other factors.

2. Find Out the Best Place to Cross:
Do not cross anywhere at all. Walk along the river to find the best point of crossing. The best point is:
- Wide and Shallow: As the river widens, the flow and level of water will be less at those points.
- No White Water: Do not cross white, foamy water. It means the water is moving too fast.
- See the Bottom: Find a place where you can already see the bottom. It means it is not too deep.
- Cross Where There Is Calm Water: Do not cross where the water is marching fast, agitated by force.
3. Determine the Current:
Take a small stick and toss it into the water. Measure how fast the stick is washed down; if it travels downstream faster than you can comfortably walk, this implies the current is too quick to cross.
4. Measure Water Depth:
If the water is higher than your knees, do not attempt the crossing. Generally, the deeper the water, the heavier the current.
5. There is a Right Time:
In some areas, rivers are going to be calmer early in the morning. That is because the sun melts the snow/ice; the level of the water then rises in the afternoon. If possible, try to cross during the early part of the day.
6. Always Have a Plan B:
A plan B is important. Do not be afraid to take another route or back off if the river appears too dangerous. Safety is first!
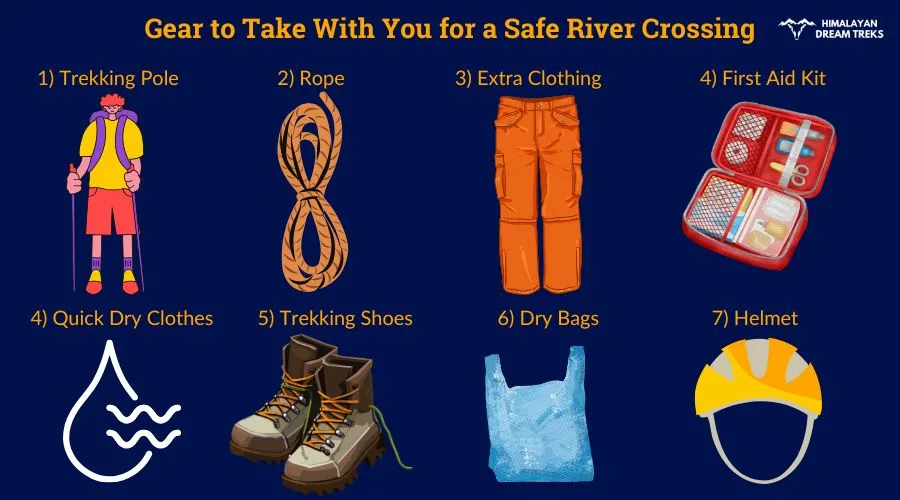
Gear to Take With You for a Safe River Crossing
Being prepared with the right gear makes a lot of difference between easy and safe while crossing a river. Here is a checklist:
- Hiking Poles: These are basically long sticks for keeping your balance. Using these, you can test how deep the water is and whether it is safe to step down.
- Quick-Dry Clothing: Wear quick-dry clothing, such as nylon shorts or convertible pants. Heavy, wet clothing will weigh you down and restrict mobility.
- Sturdy Shoes: Your feet should be protected from sharp rocks while crossing with a sturdy pair of shoes to give added traction on slipping grounds. Avoid wearing flip-flops or sandals.
- Unfastened backpack straps: Essentially, in case of a fall, that backpack is dead weight. You want to be able to get out of it easily, and the same goes for heavy jackets hanging from your shoulder.
- Dry Bags: Pack dry bags in your backpack to store valuables like clothes, food, and electronics safely away from water.
- Extra Dry Clothes: Carry an extra dry set of clothes to quickly change if you get wet and prevent cold.
- Basic First Aid Kit: A small first aid kit essentially filled is a must-have. It’s better to be safe than sorry, just in case you do end up with a bruise or tiny cut.
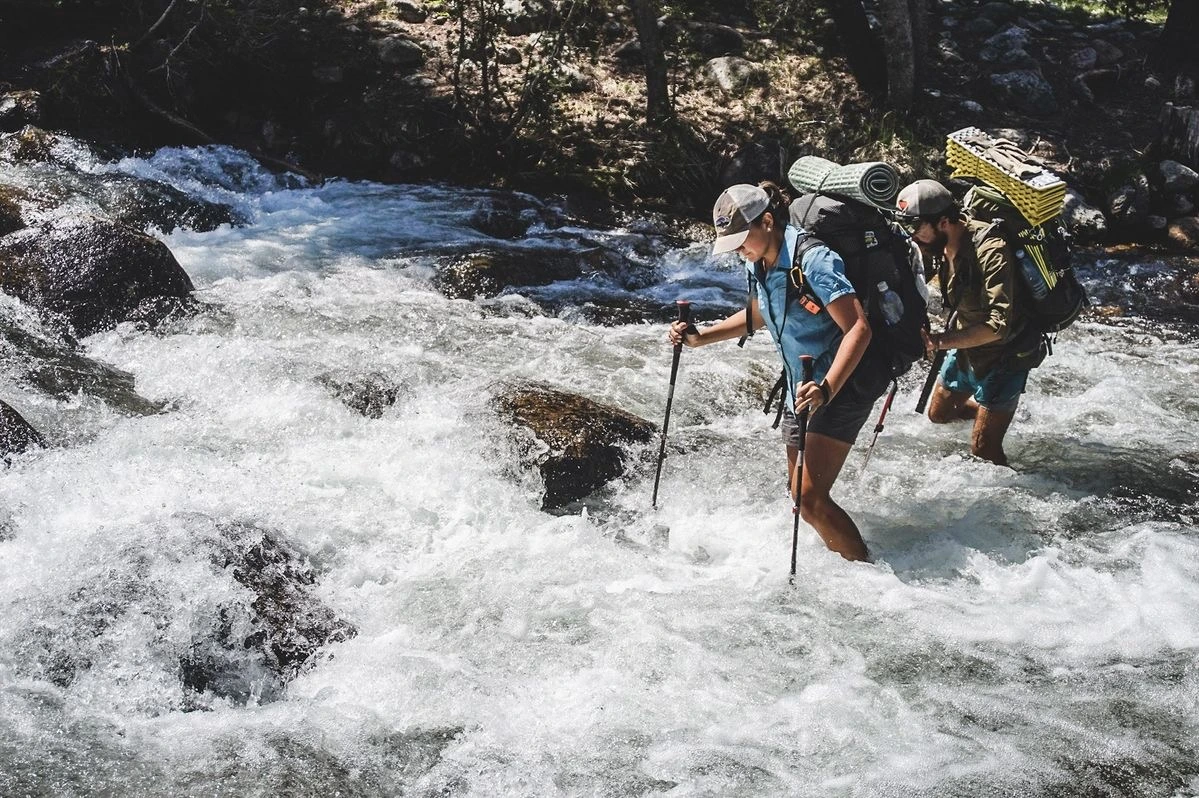
River and Stream Crossing Steps and Safety
Crossing a river requires skill and patience, so follow these steps to keep safe on your journey:
1. Always Face the Upstream Side: This way, you will have a view of the water coming towards you and will be able to make adjustments to your balance.
2. Use a Hiking Pole: Extending the pole upstream, step forward with one foot while keeping at least two points of contact with the riverbed at all times in a way that will maintain your balance.
3. Go Slow: Move in a sort of dragging step not lifted high. The foot remains in front of the other until the last possible moment.
4. Leaning Downstream: Lean against the current a little. This should keep your weight and body its own safety net.
5. Identify a Landmark across the Far Bank: Focus on a landmark on the opposite bank. The whirling water may make you dizzy.
6. Walk with Socks on Feet: Crossing rivers or streams are tricky, as the stones are often slippery and uneven. Even in shallow, knee-deep water, the risk of losing balance and slipping is high. Wearing socks provides a better grip on algae-covered slippery stones in the river, ensuring better balance and reducing the risk of slipping. This simple trick can make crossing rivers safer and more stable.
7. Stay Calm: If you find yourself losing balance, don’t panic. Try to find your balance; if you fall, lean back on the water, feet pointing downstream and protecting your head from any conflicting rocks. Hack: If you are afraid of water then try River Rafting before going on treks that require crossing streams and rivers. River Rafting will give you enough time to spend in the water and overcome your fear. Uttarakhand has a lot of rivers where you can river raft.
8. Cross in the early morning: Most of the rivers on treks are fed by glacier/snowmelt, cross in the early morning rather than late afternoon. The heat of the day increases the melt, and flow of rivers and can significantly change water levels.
9. Cross via a wider section: Rivers are best crossed in a wider section where the water has ample space to flow. The narrower the river, the more forceful the flow. Do not cross rivers in bends, as the water accelerates through the turn and the bottom may shift.
10. Approach streams with safety: Himalayan treks have more streams to cross than rivers. Himalayan streams are more dangerous in a way due to their fast flow and debris. Always listen to your guide during situations like this. Ropes are mostly used if the streams need to be crossed.
Crossing in a Group: Safety in Numbers
Crossing in a group is safer because you can support each other. Here are some tips on how to do it:
1. Human Chain:
Stand shoulder to shoulder, arms around the waist. The strongest one stands upstream to serve as a shield for the others. Take slow steps, one at a time.
2. Triangle Formation:
If you are three members, stand in the shape of a triangle. Each member grasps the others’ shoulders or packs for support.
3. Mutual Support Method:
Stand one behind the other, holding the waist or backpack strap of the person in front. The person at the front faces upstream and leads the way.
4. Communicate:
Talk to one another and move as a team. If one member is not stable, the others can support them to regain balance.
What to Do After Crossing?
After you reach the other side, don’t rush to walk on. Here’s what to do:
- Check for Injuries: Make sure nobody is hurt. Check feet for cuts or bruises. If needed, use the first aid kit.
- Dry Off and Change Clothes: Wet clothes will make you cold quickly. Change into dry clothes immediately.
- Warm Up: Drink something hot or consume high-energy food to help your body recover from the cold.
- Rest and Recover: Take a quick break before resuming your trek. This helps you rejuvenate your energy and relax.
What Not to Do: Essential Safety Tips
In order to stay safe, avoid the following common mistakes:
- Don’t Cross Barefoot: Always wear sturdy shoes to protect your feet from painful rocks and get a good grip.
- Don’t Hold Boots Around Your Neck: Some individuals carry their boots around their neck, but it is dangerous. When laces get caught, it can choke you.
- Don’t Rush: Never hurry while crossing. Cross slowly and carefully.
- Don’t Cross Alone: If at all possible, always cross in groups. It is safer to have someone to assist if necessary.
- Don’t Fight the Current: Go with the current at an angle instead of attempting to cross straight across. This helps you maintain your balance easily.
- Don’t Panic: Stay calm if you get swept away. Float on your back with your feet facing downstream until you reach a quiet area to stand up.
Summary
Rivers and stream crossing might be thrilling but can be life-threatening as well if not done with proper foresight and preparations. Always plan and make preparations with the intention of crossing. Choose the safest places, use the right equipment and the right techniques for your crossing. If in a group, coordinate amongst each other and communicate openly.
Most importantly, don’t be shy about turning around if the river seems any bit dangerous. No level of experience is worth compromising your safety.
Some Extra Tips
Some actual fieldwork tips to save yourself while crossing rivers during treks:
- For Water Coldness: Some hikers have learned to test their feet first with their fingers. If it is too cold, it numbs their feet too fast. Sometimes standing for a second to warm up with a bit of exercise onshore can turn out to be heaven’s difference.
- Listening to the River’s Pulse: In addition to visual signals, many seasoned hikers report intently listening to the sound of the river for possible clues; sudden alterations in the current’s tone may indicate hidden hazards or some deeper water.
- Mental Rehearsal: Some hikers will take just a moment or two to mentally rehearse their crossing before entering the water. Imagining each step and sensing the solidity of the riverbed can instil confidence and improve balance when one is crossing for real.
- Adapting Group Dynamics: Though traditional practices like a human chain are well documented, some groups have employed their means in accordance with the predisposition of their members and the sort of risk faced. That means putting a shy, more panic-prone member in the middle of everybody else to instill a sense of calm and alleviate panic.
By engaging with local trekkers, a widespread way has been to ask guides and park rangers in unknown places to point out well-known places. These tips might not be in famous web travel guides, but they have been known to local hikers and provide signals for a safe journey.
With these tips, you can enjoy your trekking adventure safely and make unforgettable memories. Happy trekking!
Leave a Comment