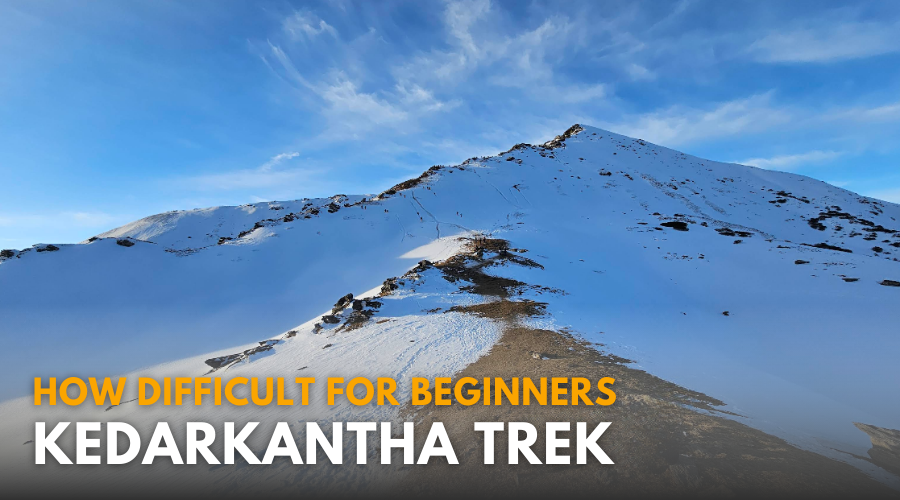
Kedarkantha is generally considered an easy-to-moderate Himalayan trek and is often chosen by first-time trekkers. However, the difficulty can change depending on snow conditions, altitude, the final summit climb and your personal fitness level.
The regular trail is non-technical, but the summit day requires more stamina because of the early start, altitude and steeper sections. This guide explains the actual difficulty of the Kedarkantha Trek, day-wise challenges, fitness requirements, snow conditions, altitude and how to prepare for the trek.
Kedarkantha Trek Difficulty Level Explained
How Difficult Is Kedarkantha Trek?
Kedarkantha is generally rated as an easy-to-moderate trek. The easy-moderate trek lies within the Govind Pashu Vihar National Park in the Uttarkashi district of Uttarakhand, IndiaThe route does not involve technical climbing, ropes or advanced mountaineering skills, but the trek still requires reasonable stamina because of the altitude and the summit climb.
The difficulty is usually lower on the initial sections of the trail and increases on summit day. Winter conditions can also make the same route more demanding because snow requires more balance, effort and careful movement.
Why Kedarkantha Is Considered Beginner-Friendly: What to Expect on Each Day
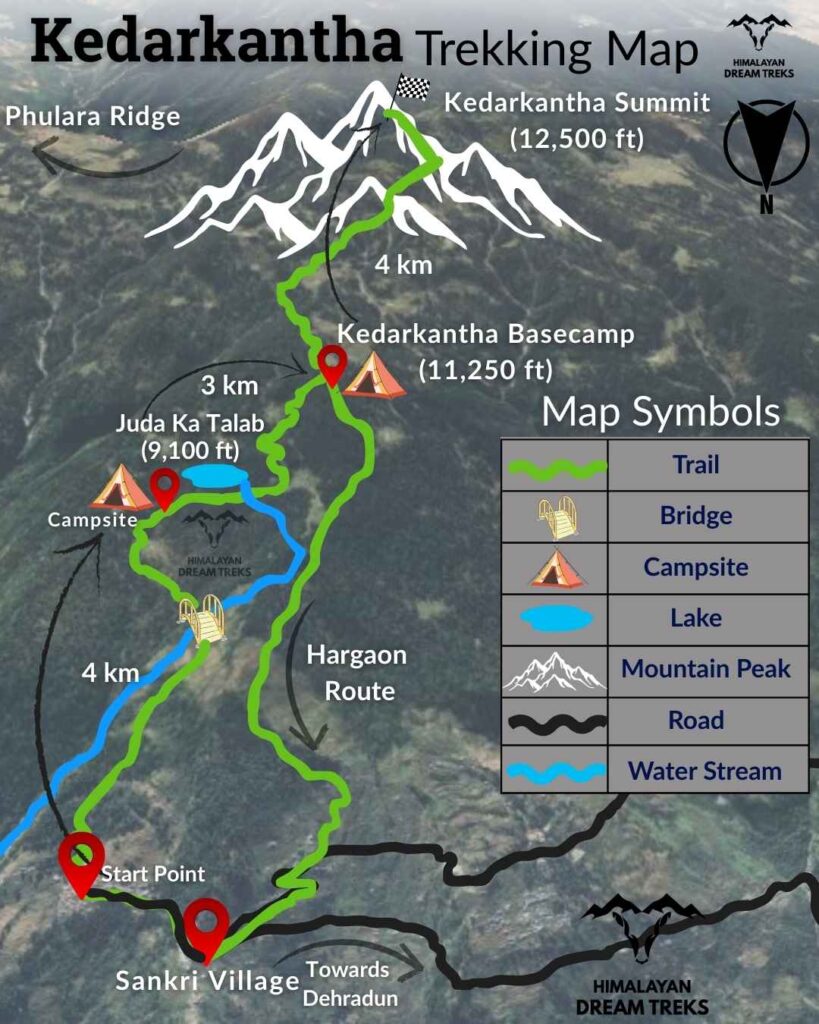
The trek begins from Sankri village, located about 200 km from Dehradun. The total trekking distance is approximately 20-22 km, covered over 3 to 4 days depending on the chosen itinerary.
- Day 1: Sankri to Juda ka Talab – Gradual ascent
- Distance & Effort: Around 4 km trek in 4–5 hours with an altitude gain of ~2,700 feet.
- Trail Condition: Wide and clear path through pine, oak, and deodar forests; safe even for beginners.
- Physical Challenge: The gradual ascent may feel tiring as it’s the first day and trekkers are adjusting to altitude while carrying backpacks.
- Overall Difficulty: Mildly challenging but very manageable, with no steep or technical sections.
- Day 2: Juda ka Talab to Kedarkantha Base Camp – Mostly Gradual with few steep sections
- Distance & Effort: Approximately 3 km trek in 2–3 hours with an altitude gain of ~1,000 feet.
- Trail Condition: Clear path through oak and rhododendron forests with occasional open meadows.
- Physical Challenge: Gentle ascent; walking becomes easier and more enjoyable as trekkers settle into the rhythm.
- Overall Difficulty: Easy and pleasant.
- Day 3: Summit Day, Kedarkantha Base Camp to Summit and back – Challenging but manageable
- Distance & Effort: About 8 km round trip, taking 6–7 hours with an altitude gain of ~2,500 feet to the summit.
- Trail Condition: Snow-covered slopes with steep sections (40°–60° incline); non-technical, no ropes or ice axes needed.
- Physical Challenge: Demanding due to early start, dark conditions, snow depth, ridge walking and steep climb; requires stamina, balance, and leg strength.
- Overall Difficulty: Moderate and challenging, but manageable for beginners with preparation; highly rewarding summit views.
- Day 4: The Descent
- Descending back to base camp and eventually to Sankri can be physically tiring because walking downhill strains the knees. In snowy conditions, the trail can be slippery, so careful steps are needed.
- Difficulty level: Manageable with trekking poles and good trekking shoes.
Why Kedarkantha’s Difficulty Level Suits Beginners
Several features make Kedarkantha accessible for beginners:
- Gradual Ascent: Except for the summit push, the trail gains altitude slowly, allowing the body time to acclimatize.
- Short Distances: Daily walking distances are usually not very long, typically between 3–5 km, which is shorter than on many other Himalayan treks.
- Max Altitude: At 12,500 ft, the trek is high but not at extreme altitudes.
- No technical climbing: You don’t need ropes, or advanced mountaineering skills.
- Well-Marked Trail: The trail is clear and easy to follow, so there’s very little chance of getting lost.
- Support System: Local guides and trek leaders provide safety and assistance throughout the trek.
Even 10-year-old children and families are often seen on this trek. Only the summit push and first section from Sankri to Juda Ka Talab can feel a little tiring because it’s the very beginning, but the forest surroundings make it enjoyable.
Key Challenges on the Kedarkantha Trek
While the trek is mostly easy, some sections raise the difficulty to a moderate level:
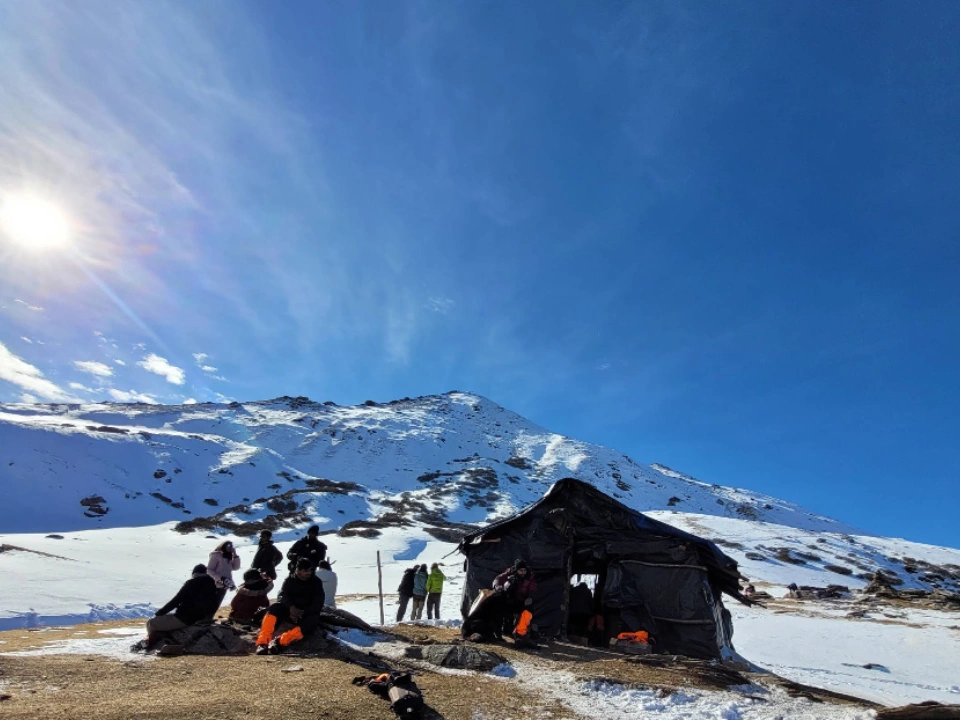
- Summit Climb: The final summit section is considerably steeper than the earlier trail and requires more stamina, particularly because the summit attempt usually starts early in the morning.
- Snow Conditions: Snow can significantly increase the difficulty of the trek. Walking on fresh or uneven snow requires more effort, balance and careful foot placement than walking on a dry trail.
- Cold Weather: Temperatures drop to around -10°C or even lower at night at higher campsites like Kedarkantha Base Camp, which can be challenging if you’re not prepared to cold conditions.
- Altitude: The summit reaches around 12,500 feet, so trekkers may experience increased breathlessness or fatigue. Maintaining a steady pace and allowing the body to adjust to altitude is important.
So overall, the trek is called easy to moderate. It’s easy because of the well-paced days, short distances, and non-technical paths. It becomes moderate because of the summit climb and snow.
How Seasons Affect the Difficulty Level of the Kedarkantha Trek
The time of year greatly affects how difficult the Kedarkantha trek feels. To help you understand this better, here’s a season-wise difficulty rating on a scale of 1 to 10. For reference, easy treks like Dayara Bugyal and Nag Tibba during the summer usually fall around 2–3 on the same scale.
- Winter (December–February): Winter is the most popular season for Kedarkantha because of its snow-covered landscape. However, snow can make walking more demanding and requires better balance, steady footing, and more energy. Fresh or deeper snow can slow the pace, while cold conditions can add to the overall physical challenge. The final summit section can feel particularly demanding during heavy snow conditions.
- Spring (March–April): As winter gradually transitions into spring, snow begins to melt and the trail becomes easier to negotiate in many sections. The overall walking conditions are generally more manageable than during peak winter, although patches of snow may still remain at higher sections. Trekkers should still be prepared for changing trail conditions.
- Summer (May–June): With most of the seasonal snow cleared from the lower and middle sections, the trail generally becomes easier to walk. The absence of deep snow reduces the additional effort required for balance and movement, making this period suitable for trekkers who prefer more straightforward trail conditions.
- Autumn (September–November): After the monsoon period, the trail conditions can become more suitable for trekking as the ground dries and the weather gradually becomes cooler. The route generally does not have the same snow-related challenges as winter, although conditions can vary at higher elevations.
Overall, winter adds the most difficulty because of snow and cold, while the non-snow seasons generally offer easier walking conditions. However, the final summit climb remains the most demanding part of the trek regardless of season.
How Difficult Is the Final Summit Climb?
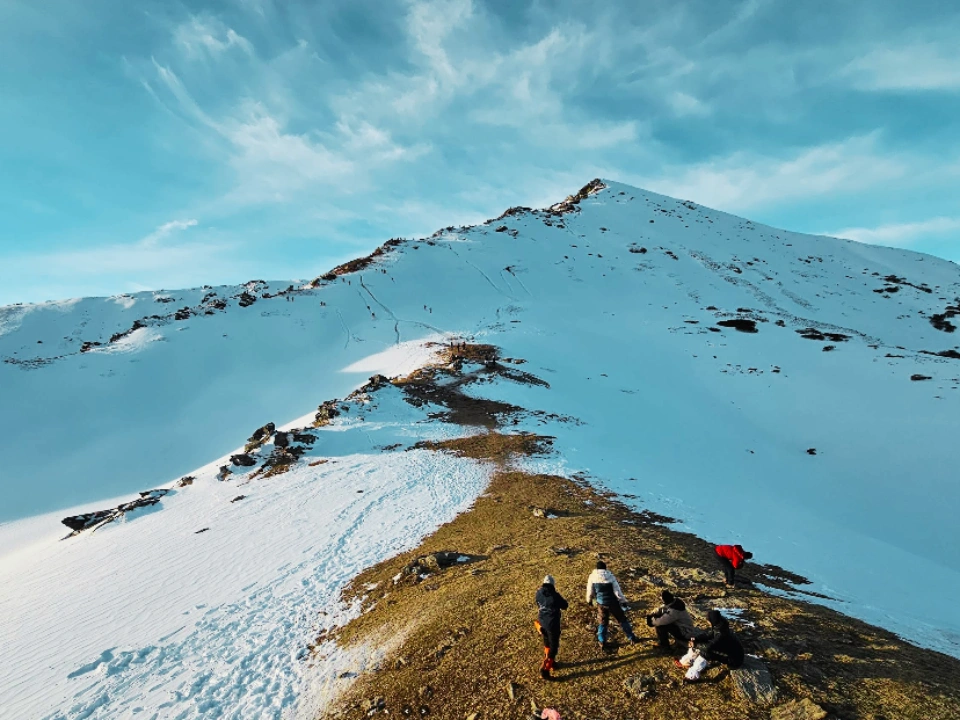
The final summit climb is the most demanding part of the Kedarkantha Trek. The climb begins early in the morning and combines higher altitude, cold temperatures, uneven terrain, and steeper sections. During winter, snow can make the ascent more physically demanding and may slow down the pace.
The summit section is non-technical, meaning trekkers do not need advanced mountaineering skills or technical climbing experience. However, the climb requires good stamina, balance, and steady pacing, especially during winter conditions. Taking regular breaks and maintaining a comfortable pace can help trekkers manage the final ascent more effectively.
Fitness Required for Kedarkantha
Kedarkantha does not require exceptional athletic fitness, but you should be comfortable walking continuously for several hours and handling both uphill and downhill sections. Good cardiovascular endurance and leg strength will make the trek significantly easier, especially during the final summit climb.
The trek involves repeated walking on uneven mountain trails, gradual ascents, descents, and a more demanding summit section. During winter, snow can further increase the effort required for walking. Being physically prepared can help you maintain a steady pace and manage the longer trekking hours more comfortably.
Beginners should start preparing several weeks before the trek rather than relying only on their normal daily activity. A preparation routine can include regular walking, brisk walking, running, cycling, and exercises such as squats, lunges, and step-ups to build endurance and leg strength.
How to Train for Kedarkantha
Preparing for the Kedarkantha Trek several weeks in advance can help you build the endurance and strength required for long walking hours and uneven mountain trails. The focus should be on improving cardiovascular endurance, strengthening the legs, building core stability, and getting your body used to longer periods of walking.
Cardio
Brisk walking, jogging, cycling, or stair climbing can help improve cardiovascular endurance. These activities prepare your body for continuous movement and uphill sections during the trek.
Leg Strength
Exercises such as squats, lunges, and step-ups can strengthen the muscles used during uphill and downhill movement. Stronger legs can also help you manage the summit climb and descents more comfortably.
Core Strength
Planks and other basic core exercises can improve stability while walking on uneven and changing terrain. A stronger core can also support better posture while carrying a backpack.
Walking Practice
Include regular long walks in your preparation and gradually increase the duration over time. Walking on varied terrain or including uphill and downhill sections can help you become more comfortable with the type of movement involved in trekking.
Flexibility & Recovery
Basic stretching can help maintain flexibility and reduce muscle stiffness during preparation. Adequate rest and recovery are equally important, allowing your body to adapt to the training without excessive fatigue.
How to Acclimatize and Adjust to Altitude on the Kedarkantha Trek
The trek is structured with short distances each day, which allows your body to adjust to the altitude gradually. Unlike higher treks like Kalindi Khal or Auden’s Col, Kedarkantha does not pose severe altitude risks. Still, it’s wise to:
- Walk at a steady pace without rushing.
- Drink plenty of water (2–3 liters a day).
- Rest well at campsites.
Because of this natural acclimatization built into the itinerary, Kedarkantha is considered safe for most trekkers, even first-timers.
Other Challenges You Might Face on the Kedarkantha Trek
Even though Kedarkantha is beginner-friendly, challenges are part of the experience:
- Cold nights in tents.
- Slippery trails when snow hardens.
- Steep summit climb that tests stamina.
- Carrying your backpack if you don’t hire a mule or porter.
- Adjusting to camping lifestyle with basic facilities.
None of these challenges are unmanageable, but being aware of them helps set realistic expectations.
Is Kedarkantha Suitable for First-Time Trekkers?
Yes, Kedarkantha can be a good choice for first-time trekkers because the route is non-technical and the daily trekking distances are generally manageable. However, beginner-friendly does not mean effortless. The summit day, altitude, cold and winter snow can make the trek physically demanding.
With basic cardiovascular fitness, leg strength, suitable trekking gear and proper preparation, beginners can approach the trek with greater confidence.
Do You Need Mountaineering Experience?
No advanced mountaineering experience is generally required for the Kedarkantha Trek. The regular route does not involve technical rock climbing, rope work or specialised mountaineering techniques.
However, trekkers should know how to walk safely on uneven and snowy terrain. In winter, proper trekking shoes, careful foot placement and trekking poles can be useful depending on trail conditions.
Food, Recovery, and Lifestyle Preparation
To enjoy the trek fully, your preparation should also include diet and lifestyle.
- Diet on Treks: Add proteins (lentils, paneer, eggs, whey protein), whole grains (wheat, barley), and green vegetables (spinach, bitter gourd, seasonal produce).
- Muscle Recovery: Stretching, yoga, and rest days between workouts.
- Hydration: 2–3 liters of water daily; coconut water and fruit juices help.
- Sleep: Aim for 7–8 hours every night.
- Avoid: Excess alcohol and caffeine, as they dehydrate the body.
These small habits go a long way in making the trek easier and more enjoyable. As the saying goes, the less fatigued you feel in the Himalayas, the more you can breathe in the beauty around you instead of being conscious of every breath.
Final Verdict: What is the Difficulty Level of Kedarkantha trek?
The Kedarkantha trek falls under the category of easy to moderate level.
- Easy because:
- Short duration (3–4 days).
- Gradual ascents.
- Non-technical route.
- Beginner-friendly campsites.
- Moderate because:
- Steep summit climb.
- Snow conditions in winter.
- Cold temperatures.
In conclusion, it’s easy-moderate. For a first-time trekker, Kedarkantha is a perfect introduction to Himalayan trekking. For experienced trekkers, it’s a refreshing snow adventure.
The trek isn’t about extreme difficulty. It’s about balance—a balance between challenge and comfort, nature and culture, forests and snowfields. That’s why Kedarkantha has become one of the most popular winter treks in Uttarakhand.

Leave a Comment